本篇文章仅作为个人技术研究记录,请勿用于非法用途。
更新说明
- 2024.01.30:重新整理文档,基于现有模式。
- 2023.7.19:添加nftables配置。
玩转智能家居,网络很关键,本篇文章我们来聊一聊怎样实现科学上网。其具体的体现就是,路由器帮我们智能的识别我们想要访问的网站,通过分析判断,将流量通过不同的路径进行转发。使用场景大家可以自己想象,这里不做过多赘述。
本次的实战是:在安装了openwrt的软路由上(主路由),通过v2ray+vps实现的翻墙。本次相关软硬件如下:
- OpenWrt:22.03.2+,该版本之后使用nftables,下面同时也给出iptables配置。
- V2ray:4.44.0,当前OpenWrt版本能安装的最高版本。
提前准备
一个路由器:博主使用软路由R2S+16GTF卡(读卡器),当然其它软路由也可或者安装了openwrt的路由器。
一个vps(墙外):用于安装v2ray服务端,帮助翻墙。
v2ray有多种传输方式,这里选用了KCP + wechat-video方式。
安装openwrt
软路由首先要刷好openwrt的系统,如何刷,我这边以R2S为例:
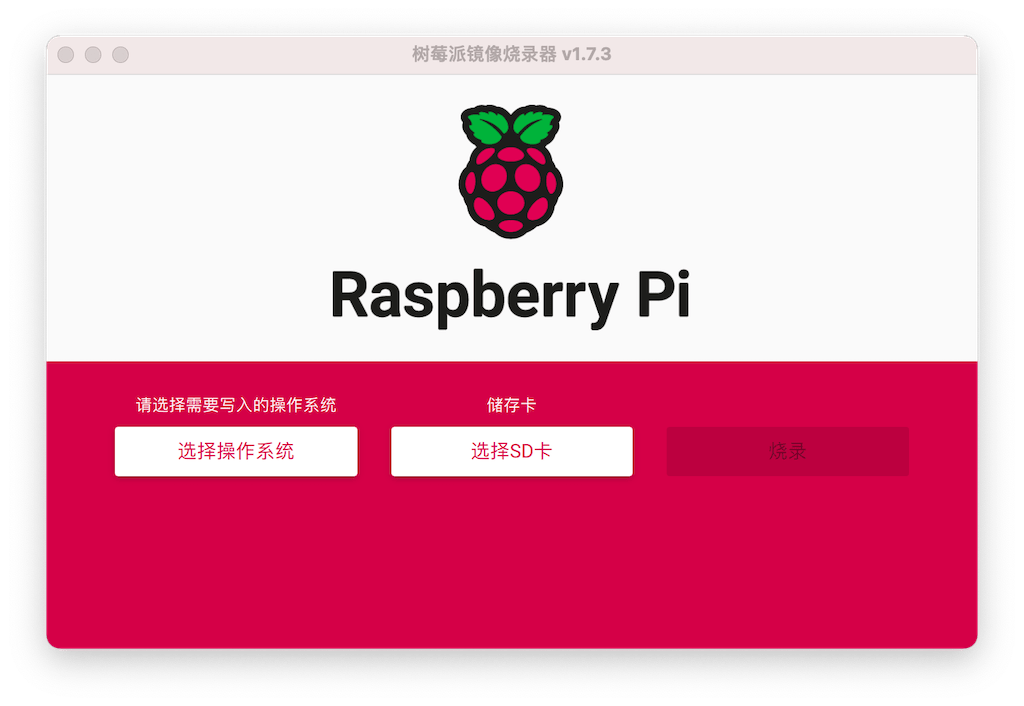
1、安装刷机软件,因为用过树莓派刷机软件挺不错,推荐给大家:https://www.raspberrypi.com/software/。
2、 下载openwrt系统,在这里可以查询你的设备支持的固件 https://firmware-selector.openwrt.org/,记得选择版本号。
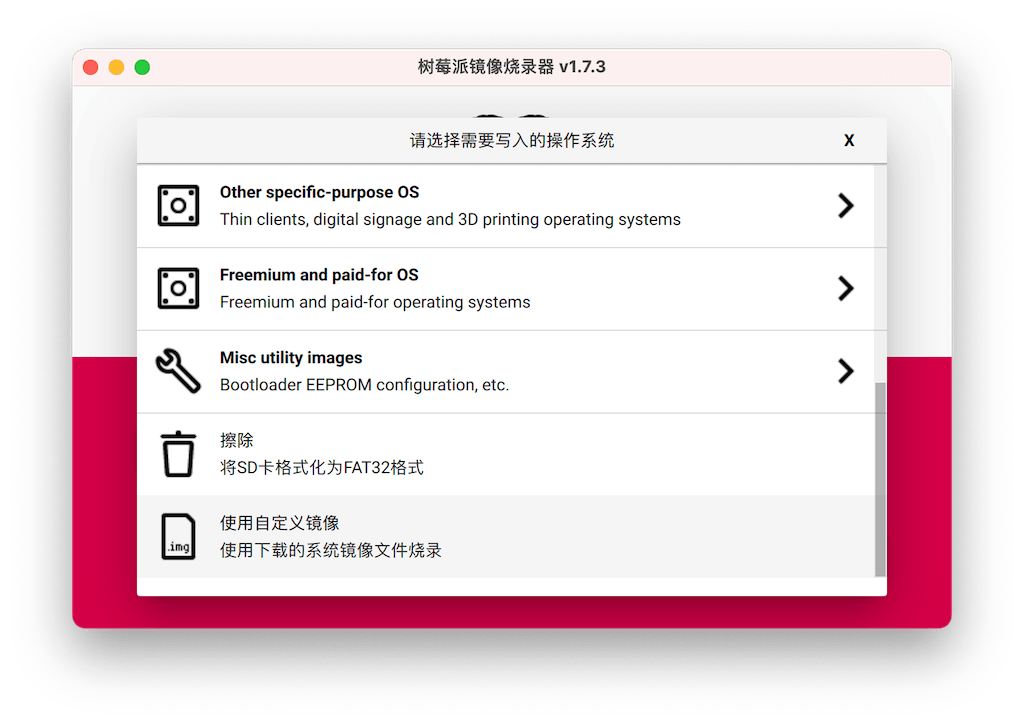
3、将TF卡连接至电脑,打开树莓派刷机软件,选择“使用自定义镜像“,选择刚才下载的openwrt系统文件,进行烧录:
一旦烧录完成,将TF插入r2s,插电即可启动。
修改网关IP
我们修改openwrt网关IP的目的是为了防止IP地址冲突,默认情况下openwrt使用的是 192.168.1.1,这与大多数光猫或路由器冲突。
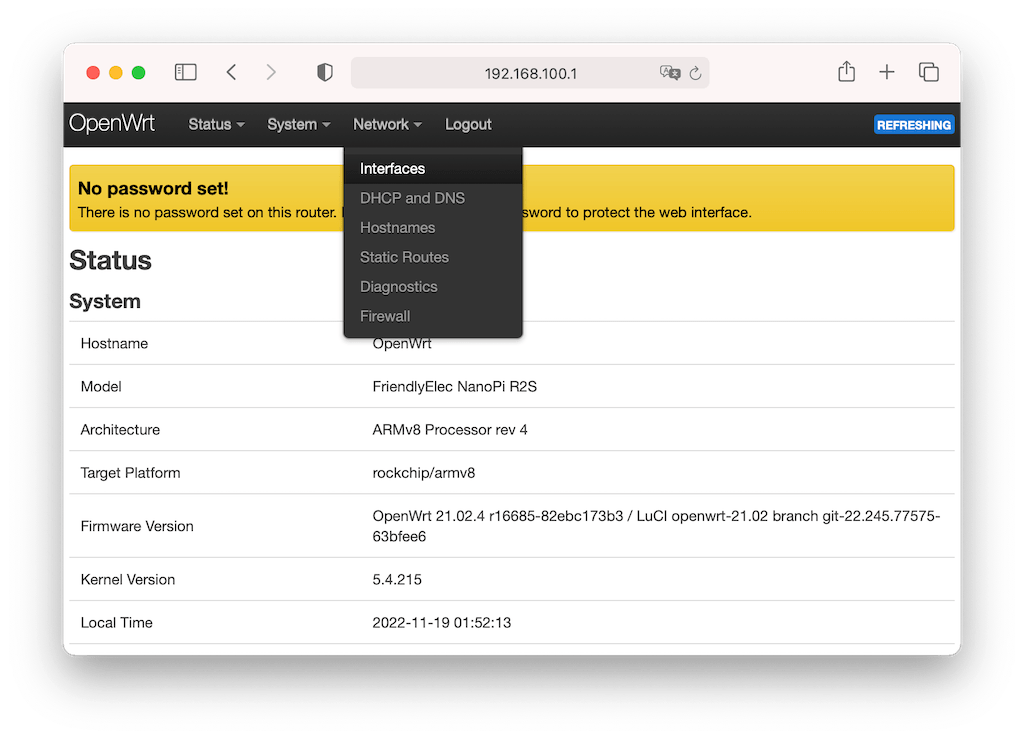
将openwrt接入到现有网络,通过路由器或光猫后台查询到该openwrt的IP地址。直接访问该IP地址,密码为空,登录。我这里是更改为 192.168.100.1。选择 Network->Interfaces:
点击 Lan 口的 Edit 按钮,将 IPv4 address 修改为你想设置的地址,保存:
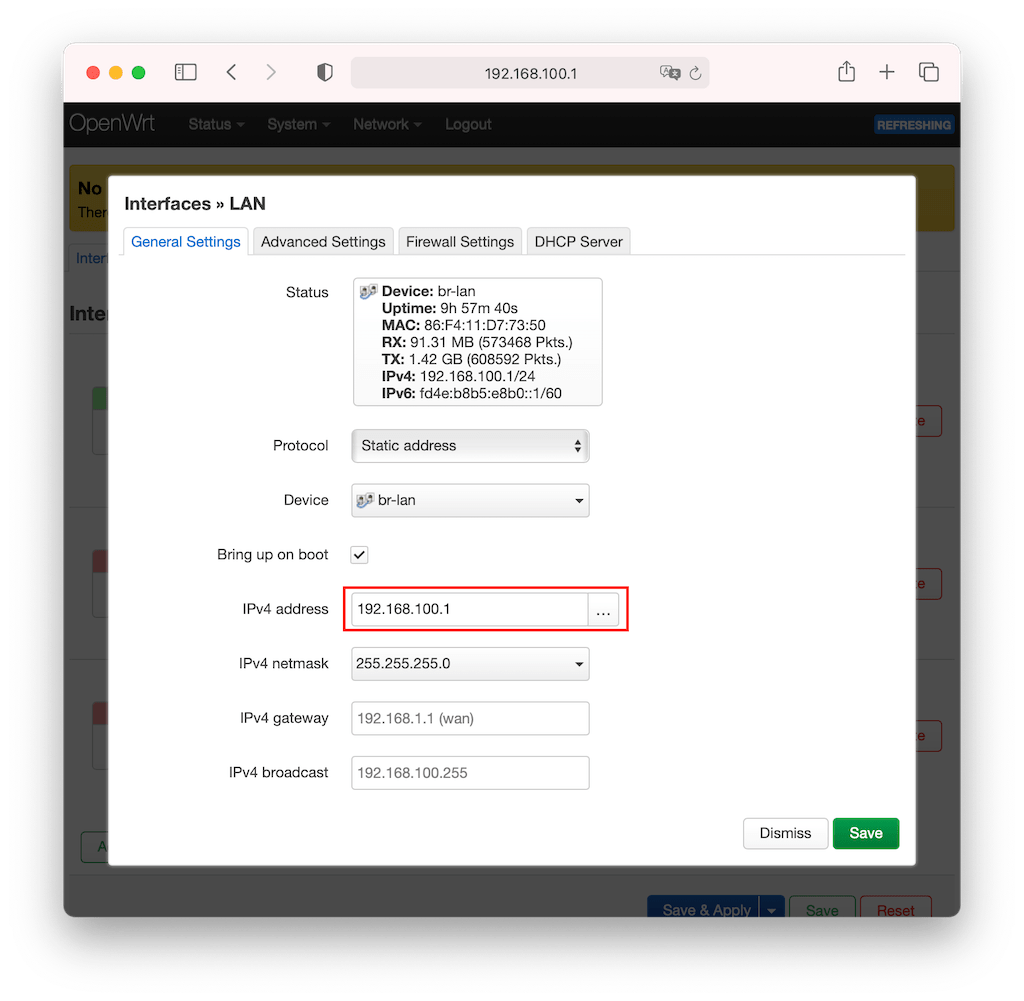
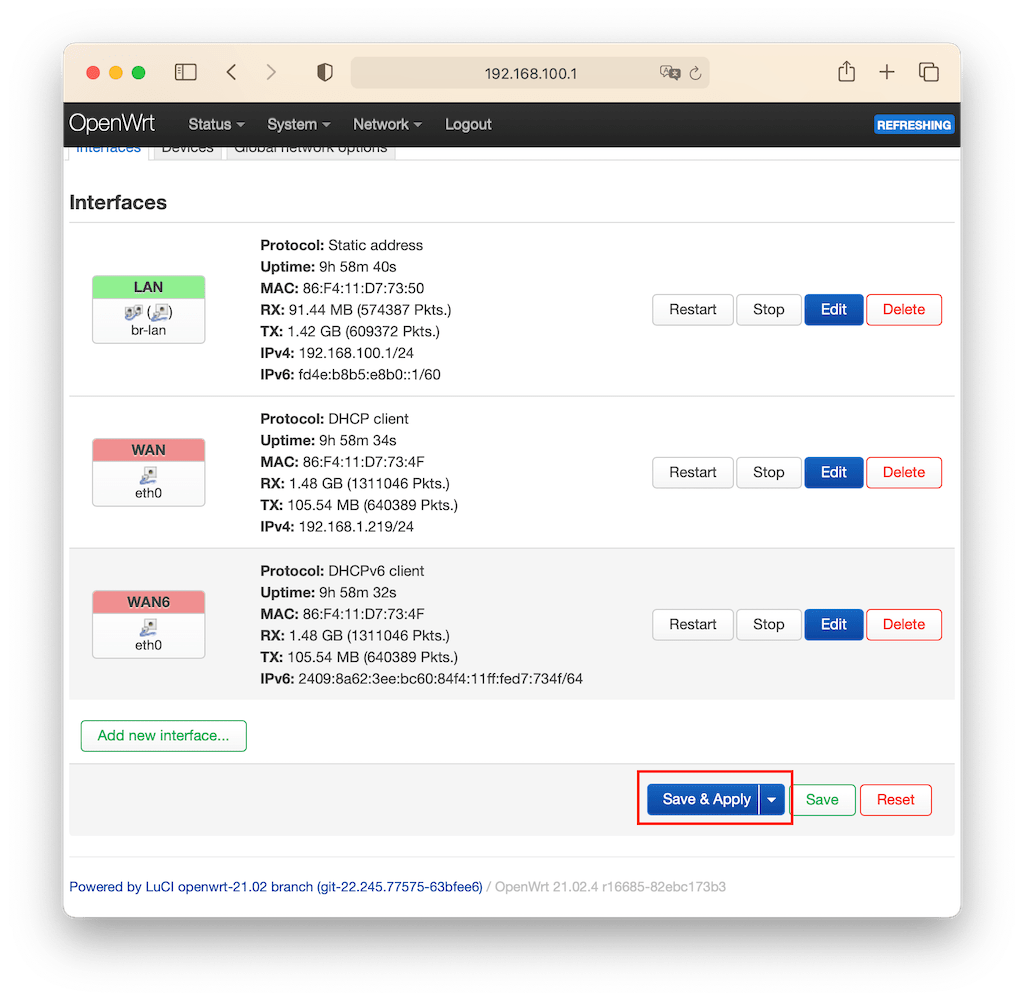
点击 Save & Apply 之后,等待片刻,即可使用新的地址 192.168.100.1 访问openwrt。
开启IP转发
本方案中openwrt需要开启IP转发才能作为网关使用:
$ echo net.ipv4.ip_forward=1 >> /etc/sysctl.conf && sysctl -p
执行后将出现 net.ipv4.ip_forward=1 的提示。
安装v2ray
如何安装v2ray?我们需要在vps上和openwrt上安装并配置v2ray的服务端和客户端。
vps服务器
服务器安装可以参考 Github 这个项目一键安装,需要提前切换到root。
$ bash <(curl -L https://raw.githubusercontent.com/v2fly/fhs-install-v2ray/master/install-release.sh)
安装的相关文件地址会打印出来,如下:
installed: /usr/local/bin/v2ray
installed: /usr/local/share/v2ray/geoip.dat
installed: /usr/local/share/v2ray/geosite.dat
installed: /usr/local/etc/v2ray/config.json
installed: /var/log/v2ray/
installed: /var/log/v2ray/access.log
installed: /var/log/v2ray/error.log
installed: /etc/systemd/system/v2ray.service
installed: /etc/systemd/system/[email protected]
设置开机自启并启动v2ray服务:
$ systemctl enable v2ray; systemctl start v2ray
修改配置文件 /usr/local/etc/v2ray/config.json:
{
  "log": {
    "access": "/var/log/v2ray/access.log",
    "error": "/var/log/v2ray/error.log",
    "loglevel": "info"
  },
  "inbounds": [
    {
      "port": 8545,
      "protocol": "vmess",
      "settings": {
        "clients": [
          {
            "id": "<客户端鉴权uuid>",
            "alterId": 0
          }
        ]
      },
      "streamSettings": {
        "network": "kcp",
        "security": "none",
        "tlsSettings": {},
        "tcpSettings": {},
        "httpSettings": {},
        "kcpSettings": {
          "mtu": 1350,
          "tti": 50,
          "uplinkCapacity": 100,
          "downlinkCapacity": 100,
          "congestion": false,
          "readBufferSize": 2,
          "writeBufferSize": 2,
          "header": {
            "type": "wechat-video"
          }
        },
        "wsSettings": {},
        "quicSettings": {}
      }
    }
  ],
  "outbounds": [
    {
      "protocol": "freedom",
      "settings": {}
    },
    {
      "protocol": "blackhole",
      "settings": {},
      "tag": "block"
    }
  ]
}
这里的uuid是作为鉴权使用,随便生成 $ v2ctl uuid,只需要保证客户端uuid填写一致即可。然后执行以下命令:
$ service v2ray restart # 重启v2ray服务
vps相关的防火墙端口记得开。如果进行调试,可以将日志等级调整为 Debug,并手动启动v2ray服务:v2ray -c /usr/local/etc/v2ray/config.json
OpenWrt
在openwrt上安装v2ray,由于openwrt上未使用bash,故我们不能够使用上面的脚本进行安装,而是采用opkg的方式,请参考 https://github.com/kuoruan/openwrt-v2ray 安装v2ray-core。
也可以直接在openwrt网页上操作,一样的:
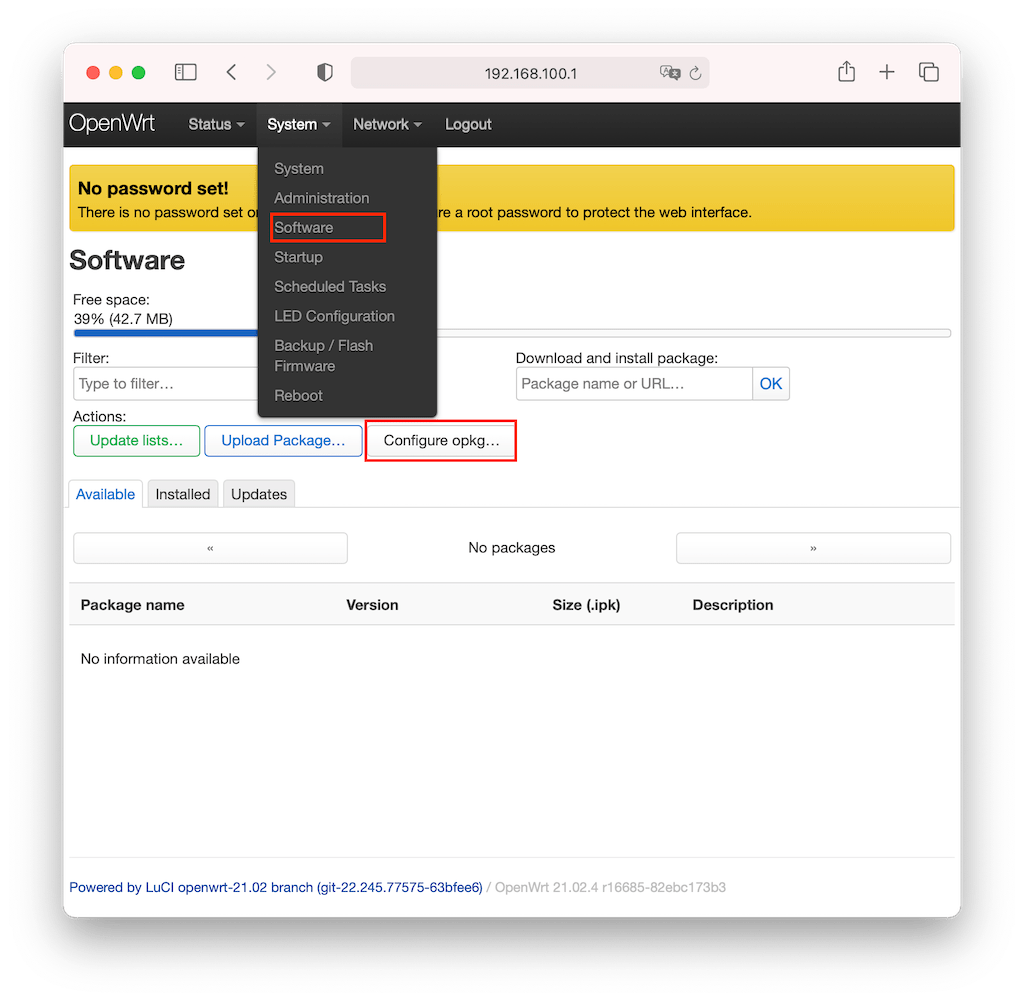
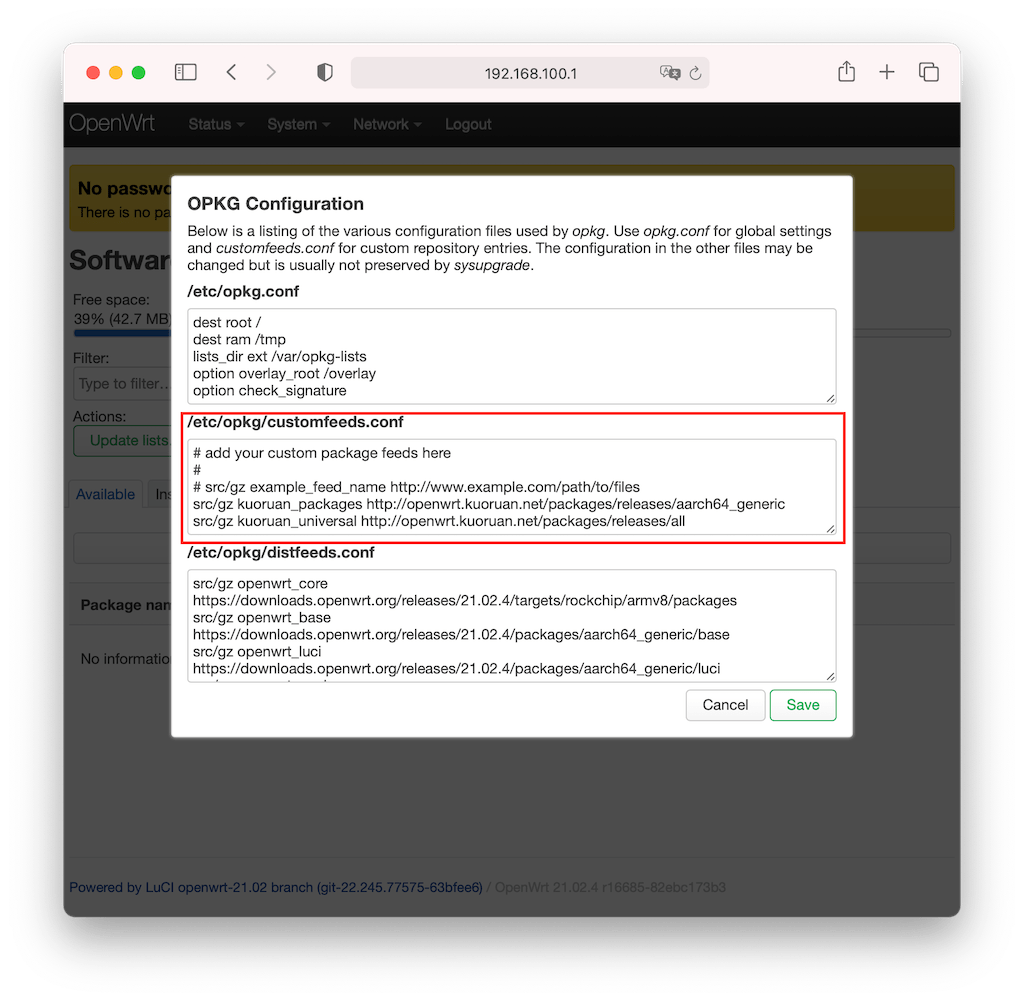
保存后,然后点击 Update lists,完成后搜索v2ray进行安装即可:
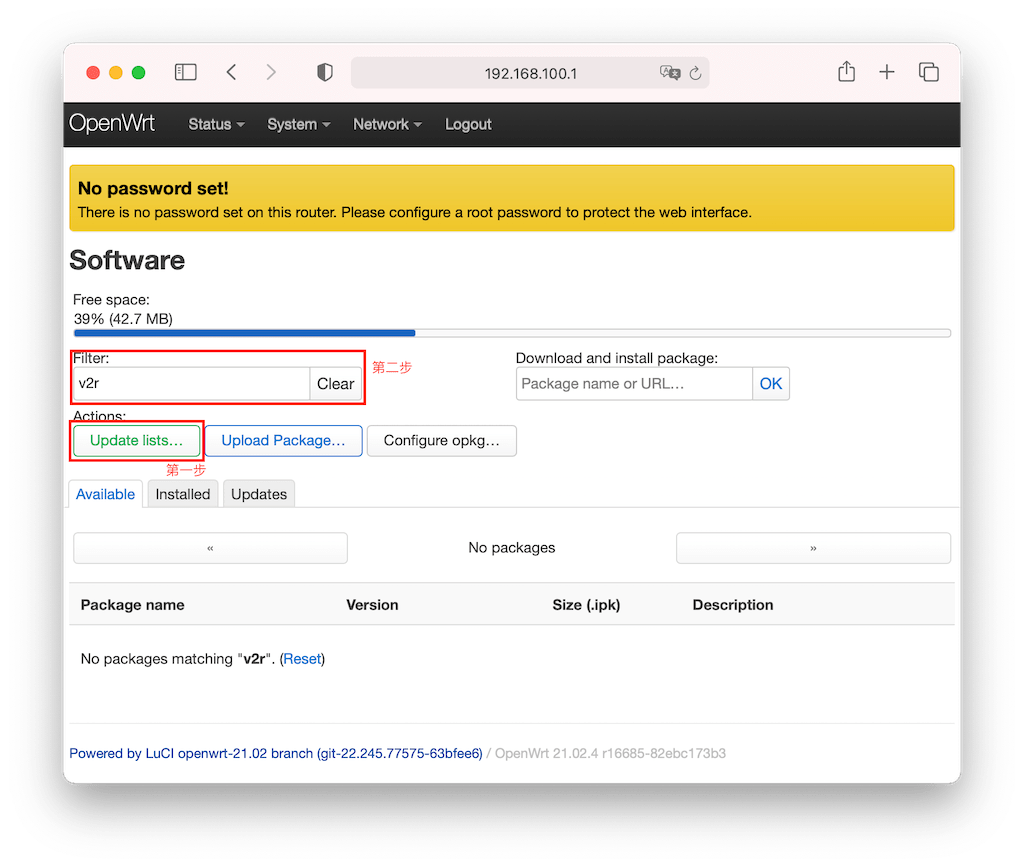
注意,这里可能由于网络的问题,安装过程较长时间,请耐心等候,或多次尝试。
通过SSH登录到openwrt:ssh [email protected],编辑新建配置文件 /etc/config/v2ray:
{
    "log": {
        "loglevel": "info"
    },
    "inbounds": [
        {
            "listen": "0.0.0.0",
            "port": 30000,
            "protocol": "dokodemo-door",
            "settings": {
                "network": "tcp,udp",
                "followRedirect": true
            },
            "sniffing": {
                "enabled": true,
                "destOverride": [
                    "http",
                    "tls"
                ]
            },
            "streamSettings": {
                "sockopt": {
                    "tproxy": "tproxy",
                    "mark": 2
                }
            },
            "tag": "transparent"
        },
       {
            "listen": "0.0.0.0",
            "port": 30443,
            "protocol": "socks",
            "settings": {
                "auth": "noauth",
                "udp": false
            }
        },
        {
            "listen": "0.0.0.0",
            "port": 30080,
            "protocol": "http",
            "settings": {
                "timeout": 360
            }
        }
    ],
    "outbounds": [
        {
            "streamSettings": {
                "network": "kcp",
                "security": "none",
                "kcpSettings": {
                    "downlinkCapacity": 20,
                    "writeBufferSize": 1,
                    "readBufferSize": 1,
                    "header": {
                        "type": "wechat-video"
                    },
                    "uplinkCapacity": 50,
                    "congestion": false,
                    "tti": 20,
                    "mtu": 1350
                }
            },
            "tag": "proxy",
            "mux": {
                "concurrency": 8,
                "enabled": false
            },
            "settings": {
                "vnext": [
                    {
                        "users": [
                            {
                                "level": 0,
                                "security": "aes-128-gcm",
                                "alterId": 0,
                                "id": "<客户端鉴权uuid>"
                            }
                        ],
                        "address": "<vps服务器地址>",
                        "port": 8545
                    }
                ]
            },
            "protocol": "vmess"
        },
        {
            "protocol": "freedom",
            "settings": {
                "domainStrategy": "UseIP"
            },
            "streamSettings": {
                "sockopt": {
                    "mark": 2
                }
            },
            "tag": "direct"
        },
        {
            "protocol": "blackhole",
            "settings": {
                "response": {
                    "type": "none"
                }
            },
            "tag": "adblock"
        },
        {
            "protocol": "dns",
            "streamSettings": {
                "sockopt": {
                    "mark": 2
                }
            },
            "tag": "dns-out"
        }
    ],
   "dns": {
        "servers": [
            {
                "address": "223.5.5.5",
                "port": 53,
                "domains": [
                    "geosite:cn",
                    "ntp.org"
                ],
                "expectIPs": [
                    "geoip:cn"
                ]
            },
            {
                "address": "114.114.114.114",
                "port": 53,
                "domains": [
                    "geosite:cn",
                    "ntp.org"
                ],
                "expectIPs": [
                    "geoip:cn"
                ]
            },
            {
                "address": "1.1.1.1",
                "port": 53,
                "domains": [
                    "geosite:geolocation-!cn",
                    "geosite:speedtest"
                ]
            },
            {
                "address": "8.8.8.8",
                "port": 53,
                "domains": [
                    "geosite:geolocation-!cn",
                    "geosite:speedtest"
                ]
            },
            "localhost"
        ]
    },
    "routing": {
        "domainStrategy": "IPOnDemand",
        "rules": [
            {
                "type": "field",
                "inboundTag": [
                    "transparent"
                ],
                "port": 53,
                "network": "udp",
                "outboundTag": "dns-out"
            },
            {
                "type": "field",
                "inboundTag": [
                    "transparent"
                ],
                "port": 123,
                "network": "udp",
                "outboundTag": "direct"
            },
            {
                "type": "field",
                "ip": [
                    "223.5.5.5",
                    "114.114.114.114"
                ],
                "outboundTag": "direct"
            },
            {
                "type": "field",
                "ip": [
                    "8.8.8.8",
                    "1.1.1.1"
                ],
                "outboundTag": "proxy"
            },
            {
                "type": "field",
                "domain": [
                    "geosite:category-ads-all"
                ],
                "outboundTag": "adblock"
            },
            {
                "type": "field",
                "protocol": [
                    "bittorrent"
                ],
                "outboundTag": "direct"
            },
            {
                "type": "field",
                "ip": [
                    "geoip:private",
                    "geoip:cn"
                ],
                "outboundTag": "direct"
            },
            {
                "type": "field",
                "domain": [
                    "geosite:cn"
                ],
                "outboundTag": "direct"
            }
        ]
    }
}
不对配置做过多解释,你需要替换掉配置中需要修改的部分 <客户端鉴权uuid> 和 vps服务器IP。执行 v2ray -c /etc/config/v2ray,等待启动成功。
此时,我们已经可以进行智能上网了,当然这里还没有实现 透明代理。验证方式,通过指定代理:
$ http_proxy=192.168.100.1:30080 curl -Lv google.com # 墙外测试
$ http_proxy=192.168.100.1:30080 curl -Lv baidu.com # 墙内测试
透明代理
这里我们的软路由是作为旁路由使用的,因此需要实现全局的智能上网(透明代理),所有连接到该路由的设备都可以智能的选择网络路线。透明代理原理是通过 nftables 的路由转发等功能。
完成安装后,请ssh到openwrt。iptables 执行:
# 设置策略路由
ip rule add fwmark 1 table 100
ip route add local 0.0.0.0/0 dev lo table 100


# 代理局域网设备
iptables -t mangle -N V2RAY
# 目标网关所在网段请求直连, 执行:
#  ip address | grep -w "inet" | awk '{print $2}'
iptables -t mangle -A V2RAY -d 10.0.0.0/8 -j RETURN
iptables -t mangle -A V2RAY -d 100.64.0.0/10 -j RETURN
iptables -t mangle -A V2RAY -d 127.0.0.0/8 -j RETURN
iptables -t mangle -A V2RAY -d 169.254.0.0/16 -j RETURN
iptables -t mangle -A V2RAY -d 172.16.0.0/12 -j RETURN
iptables -t mangle -A V2RAY -d 192.0.0.0/24 -j RETURN
# 目标地址为组播IP/E类地址/广播IP直连
iptables -t mangle -A V2RAY -d 224.0.0.0/4 -j RETURN
iptables -t mangle -A V2RAY -d 240.0.0.0/4 -j RETURN
iptables -t mangle -A V2RAY -d 255.255.255.255/32 -j RETURN

iptables -t mangle -A V2RAY -d 192.168.100.0/24 -p tcp ! --dport 53 -j RETURN
iptables -t mangle -A V2RAY -d 192.168.100.0/24 -p udp ! --dport 53 -j RETURN
iptables -t mangle -A V2RAY -m mark --mark 2 -j RETURN

# 给 UDP 打标记 1,转发至 30000 端口
iptables -t mangle -A V2RAY -p udp -j TPROXY --on-port 30000 --tproxy-mark 1
# 给 TCP 打标记 1,转发至 30000 端口
iptables -t mangle -A V2RAY -p tcp -j TPROXY --on-port 30000 --tproxy-mark 1
# 应用规则
iptables -t mangle -A PREROUTING -j V2RAY


# 代理网关本机
iptables -t mangle -N V2RAY_MASK
# 目标网关所在网段请求直连
# 执行: ip address | grep -w "inet" | awk '{print $2}'
iptables -t mangle -A V2RAY_MASK -d 10.0.0.0/8 -j RETURN
iptables -t mangle -A V2RAY_MASK -d 100.64.0.0/10 -j RETURN
iptables -t mangle -A V2RAY_MASK -d 127.0.0.0/8 -j RETURN
iptables -t mangle -A V2RAY_MASK -d 169.254.0.0/16 -j RETURN
iptables -t mangle -A V2RAY_MASK -d 172.16.0.0/12 -j RETURN
iptables -t mangle -A V2RAY_MASK -d 192.0.0.0/24 -j RETURN
# 目标地址为组播IP/E类地址/广播IP直连
iptables -t mangle -A V2RAY_MASK -d 224.0.0.0/4 -j RETURN
iptables -t mangle -A V2RAY_MASK -d 240.0.0.0/4 -j RETURN
iptables -t mangle -A V2RAY_MASK -d 255.255.255.255/32 -j RETURN

iptables -t mangle -A V2RAY_MASK -d 192.168.100.0/24 -p tcp ! --dport 53 -j RETURN
iptables -t mangle -A V2RAY_MASK -d 192.168.100.0/24 -p udp ! --dport 53 -j RETURN
iptables -t mangle -A V2RAY_MASK -m mark --mark 2 -j RETURN
# 给流量打标记, 重路由
iptables -t mangle -A V2RAY_MASK -p tcp -j MARK --set-mark 1
iptables -t mangle -A V2RAY_MASK -p udp -j MARK --set-mark 1
# 应用规则
iptables -t mangle -A OUTPUT -j V2RAY_MASK


# DIVERT 规则, 避免已有连接的包二次通过 TPROXY
iptables -t mangle -N DIVERT
iptables -t mangle -A DIVERT -j MARK --set-mark 1
iptables -t mangle -A DIVERT -j ACCEPT
iptables -t mangle -I PREROUTING -p tcp -m socket -j DIVERT
nftbles 执行:
#!/usr/sbin/nft -f

# 清空已有规则
flush ruleset

# 局域网的地址
define RESERVED_IP = {
  10.0.0.0/8,
  100.64.0.0/10,
  127.0.0.0/8,
  169.254.0.0/16,
  172.16.0.0/12,
  192.0.0.0/24,
  224.0.0.0/4,
  240.0.0.0/4,
  255.255.255.255/32,
}

# 代理设备
table ip v2ray {
  # 局域网
  chain prerouting {
    type filter hook prerouting priority 0; policy accept;
    ip daddr $RESERVED_IP return

    meta l4proto tcp ip daddr 192.168.0.0/16 return # 直连局域网
    ip daddr 192.168.100.0/24 tcp dport != 53 return
    ip daddr 192.168.100.0/24 udp dport != 53 return
    meta mark 2 return # 直连流量
    meta l4proto { tcp, udp } meta mark set 0x1 tproxy to :30000 accept # 转发至v2ray
  }

  # 网关本机
  chain output {
    type route hook output priority 0; policy accept;
    ip daddr $RESERVED_IP return

    meta l4proto tcp ip daddr 192.168.0.0/16 return # 直连局域网
    ip daddr 192.168.100.0/24 tcp dport != 53 return
    ip daddr 192.168.100.0/24 udp dport != 53 return
    meta mark 2 return # 直连流量
    meta l4proto { tcp, udp } meta mark set 0x1 accept # 重路由至prerouting
  }
}

# DIVERT规则
table ip filter {
  chain divert {
    type filter hook prerouting priority -150; policy accept;
    meta l4proto tcp socket transparent 1 meta mark set 1 accept
  }
}
请注意,这里有代理局域网设备和网关本机的配置,可自行选者。这里 192.168.100.0/24 需要换成你openwrt路由器的IP地址段。进行测试:
$ curl -Lv google.com # 墙外测试
$ curl -Lv baidu.com # 墙内测试
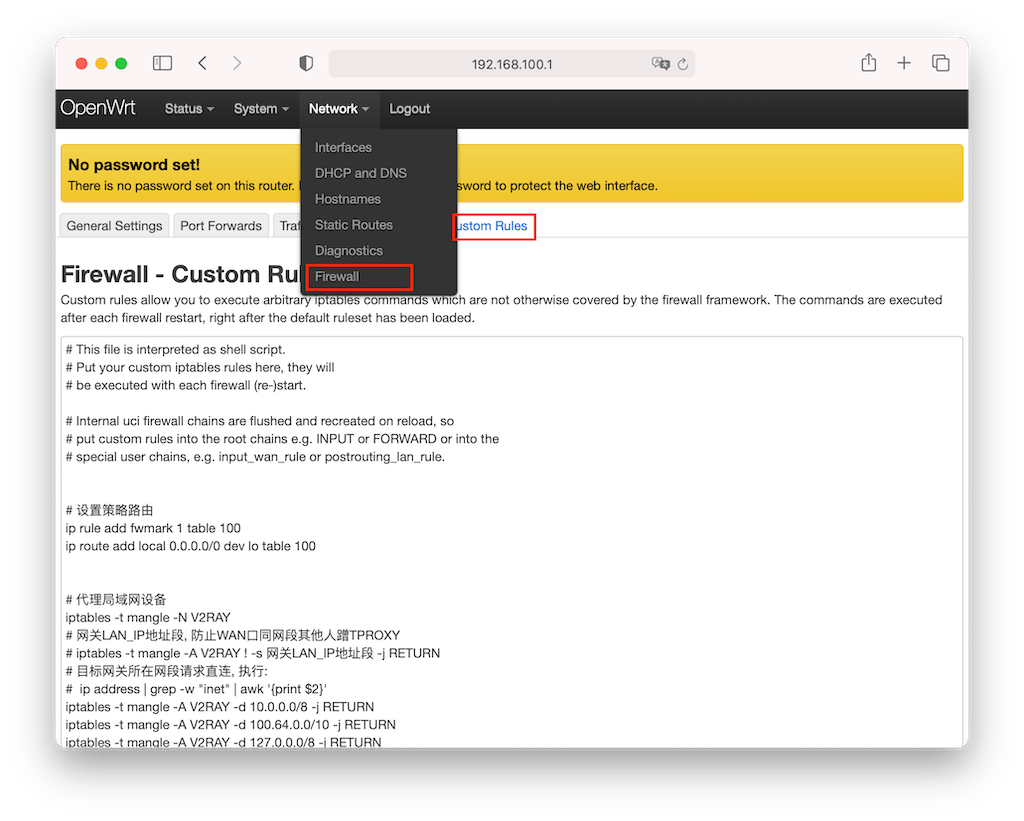
如果执行完上面的 iptables 或 nftables 命令之后,路由器的访问出现问题,如ssh连不上openwrt,可通过重启路由器的方式解决。因为这里的规则是软写入的,在内存中,重启之后就会无效。因此,一旦你测试成功,请将配置粘贴到openwrt中的 Network->Firewall->Custom Rules 进行固化:
FAQ
1、更多关于透明代理的原理和细节可以参考以下文章:
2、openwrt如何实现v2ray后台运行,开机自启,解决 too many open files?
编辑新建 /etc/init.d/v2ray:
#!/bin/sh /etc/rc.common

USE_PROCD=1
START=99

NAME=v2ray
PROG=/usr/bin/v2ray

start_service() {
        procd_open_instance $NAME
        procd_set_param command "$PROG" -config /etc/config/v2ray

        procd_set_param file /etc/config/v2ray

        procd_set_param limits core="unlimited"
        procd_set_param limits nofile="1000000 1000000"
        procd_set_param stdout 1
        procd_set_param stderr 1
        # respawn automatically if something died, be careful if you have an alternative process supervisor
        # if process dies sooner than respawn_threshold, it is considered crashed and after 5 retries the service is stopped
        # /etc/init.d/your_service reload will restart the daemon if these files have changed
        procd_set_param respawn ${respawn_threshold:-3600} ${respawn_timeout:-5} ${respawn_retry:-5}

        procd_close_instance
}

reload_service() {
        stop
        start
}
添加执行权限 $ chmod +x /etc/init.d/v2ray。可执行:
$ /etc/init.d/v2ray start/stop/restart # 启动/停止/重启
参考文章
本文链接:https://deepzz.com/post/router-openwrt-v2ray-tproxy.html,参与评论 »
--EOF--
发表于 2022-11-12 11:29:00,并被添加「家庭网络、openwrt、v2ray」标签。
本站使用「署名 4.0 国际」创作共享协议,转载请注明作者及原网址。更多说明 »
提醒:本文最后更新于 967 天前,文中所描述的信息可能已发生改变,请谨慎使用。
专题「智能家居」的其它文章 »
- 如何玩转智能家居 - 组建局域网,访问家庭网络 (Nov 20, 2022)
- 如何玩转智能家居 - 网络组网方案实施 (Jun 23, 2022)
- 如何玩转智能家居 - 家庭组网方案选择 (Apr 13, 2022)
- 如何玩转智能家居 - 灯控方案选择 (Mar 31, 2022)
- 如何玩转智能家居 - HomeAssistant接触 (Apr 12, 2021)
- 如何玩转智能家居 - HomeAssistant介绍 (Mar 26, 2021)
Comments